Pin art boards allow users to press objects or parts of the body on one end and see a depth image of it emerge on the other side, and the computer game Portal allows players to seamlessly move objects or themselves between a pair of wormholes. Put these interactive concepts together, and you can create the illusion of a real working pair of portals, albeit with a pin art board halfway through them. On one end is a pin art board halfway submerged through one "portal" with push potentiometers behind each pin. On the other end is the "other half" of that pin art board, with linear actuators behind each pin to mirror the extent to which the corresponding pin on the other end is pushed out. This gives the illusion that it is the same pin art board, and that the portals are working just the way they do in the iconic computer game.
For this project, my goal was to make a simple game with the ultrasonic distance sensor. Specifically, one wherein players guess how far they need to place an object in front of the sensor, submitting their guess with a button and being told which side of the target they were on via a pair of LED's. When the player guesses correctly, the target changes and another round starts.
Setup
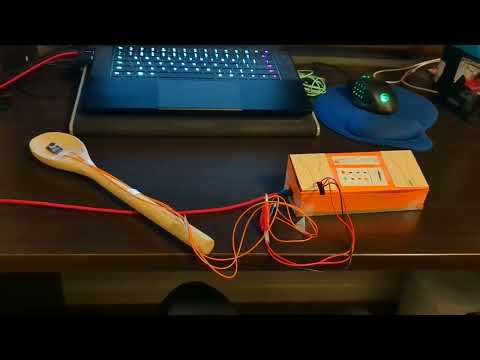
The physical components, starting from the Arduino 33 IoT on one end, goes in the order of button, colored LED's, and sensor. This is arranged with the vision of the left hand pressing the button and the right hand moving the object left or right, with the Arduino side towards the player. If the object needs to be moved right, away from the sensor, the red LED on the right will blink. If the object needs to be moved left, towards the sensor, the green LED on the left will blink. If the object is in the right spot, both LED's will blink in unison, starting the next round afterwards.
On the programming side of the equation, the program starts by randomizing an answer within a certain centimeter range. In the main loop, button presses are tracked by comparing the states of the button at the last update and the current one. If the button was LOW at the last update and is HIGH now, the button has just been pressed, and it is time for the sensor to measure the distance of the object. The sensor measures pulses to the object several times, converting pulse duration to centimeters, and averages the results out. The measured guess is compared with the actual answer, determining which LED should blink. Since this function is not asynchronous and uses delay(), button presses are not registered and the user cannot guess again while the LED is blinking, as should be the case.
The biggest problem I faced was the sensor. Even with smoothing, its readings had major spikes at near and far distances. This was to be expected as I tested it with my hand, which is not an entirely flat surface. However, the problem seemed to persist even with objects like the box seen in the video, potentially breaking the fundamental mechanic of the game. I'm not sure if my sensor is faulty or this is a general problem.
Even as I dabbled with the distance sensor before we learned about it in class, I couldn't seem to get it to work at all. I researched the issue extensively online and concluded that I wasn't getting power from the right pin, but none of the solutions I found pointed to what my wiring should look like.
This Arduino setup has two LED's (one green on the left, one red on the right), a switch, and a button. The switch controls which LED is active (respective to left and right on the switch), and the button can be held down to make the active button blink.
I wanted to take what was done in class and build upon it. At first I wondered how I could get creative with just two inputs and two binary LED's, considering either LED basing their state on some discrete math operator of the two inputs (XOR, imply, etc.). I then recalled our previous exercise in blinking, and wondered if I could combine the two exercises.
Making blinking toggleable alongside switching the active LED would make the code need to be synchronous (unlike the delay() method in the Blink example) because the state of the switch would have to be read every update. Sure enough I was able to find a tutorial on writing such code, checking the time every update with mills() and keeping track of the last blink's timestamp.